
Adding New Appointment
Step-by-step guide to creating an appointment for a client - from selecting a service to sending a notification
How to create a new appointment?
Creating an appointment in ZmanUp is a simple and intuitive process. In just a few steps, you can book time for a client, select the needed service, and send a notification.
How to open the appointment creation form:
- Click the '+' button in the calendar on the desired date and time
- Click 'Add Appointment' in the main calendar menu
- Use quick creation through the client card
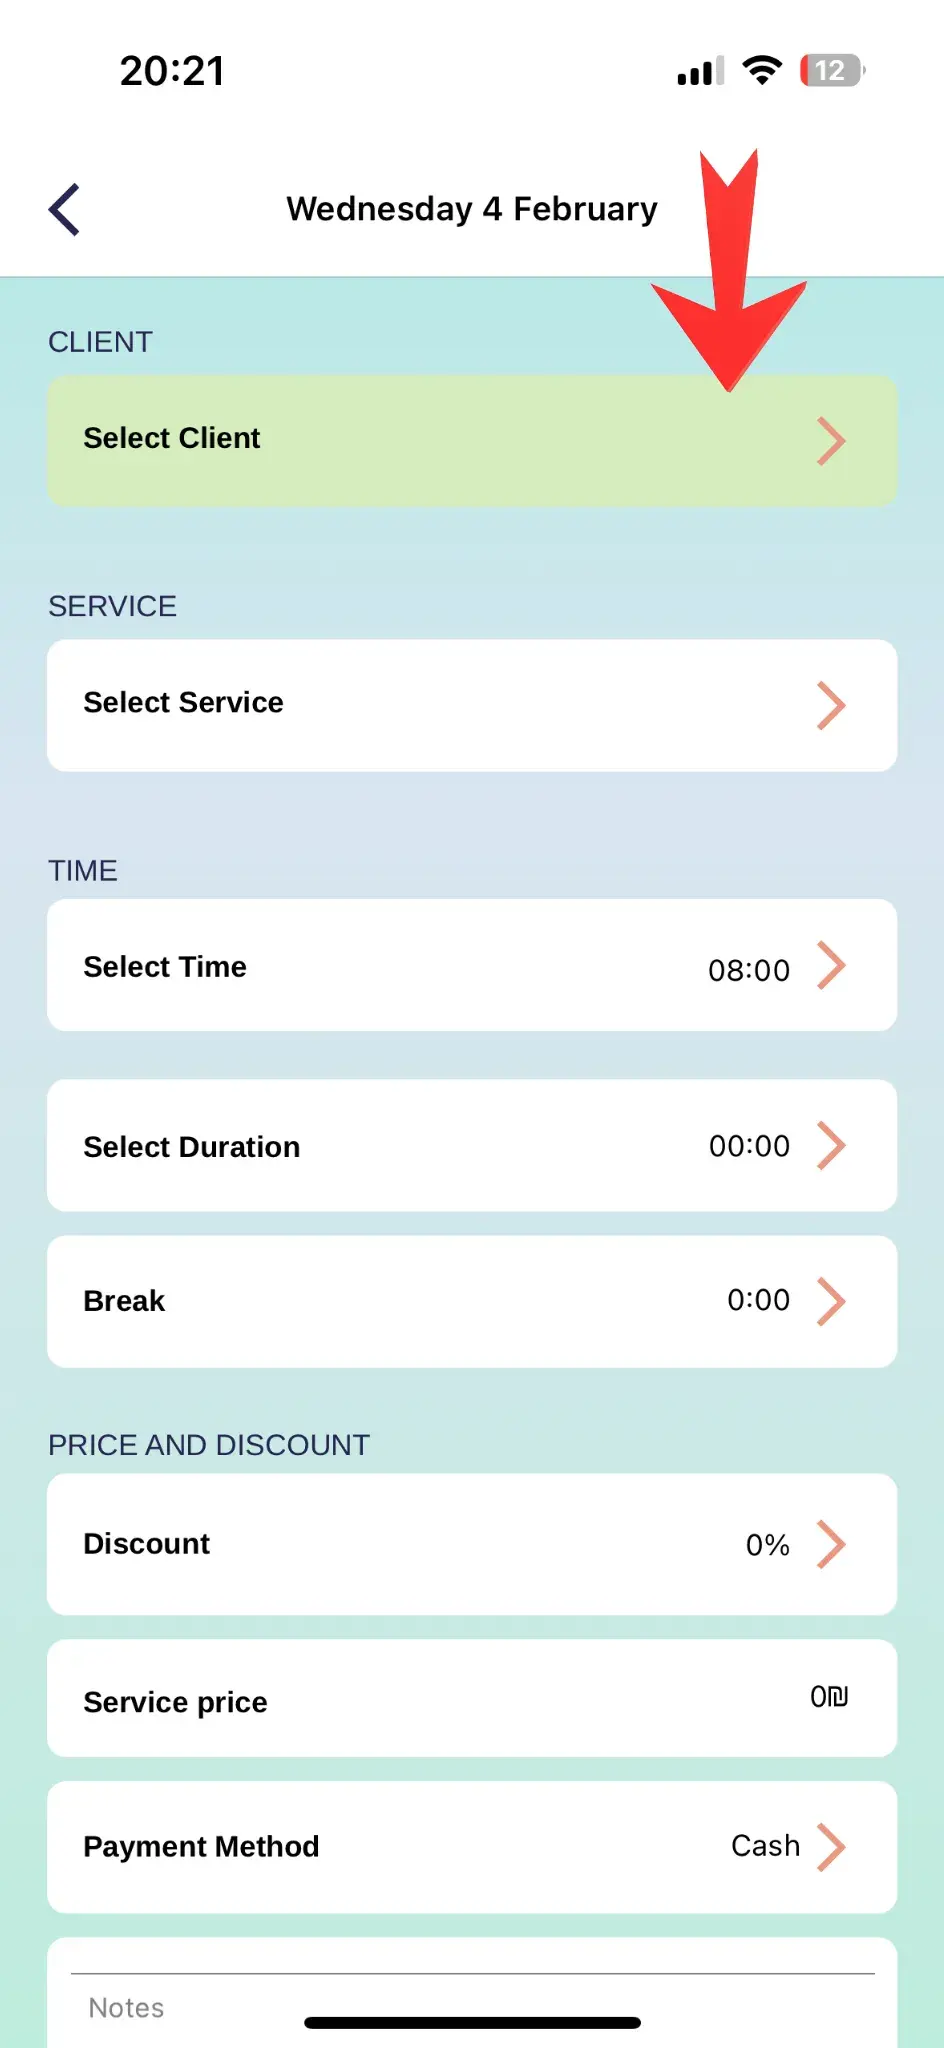
Select Client
Choose an existing client or create a new one
The first step is selecting the client for whom the appointment is being created. The system offers several options:
Client selection options:
- Select from list: choose a client from your database
- Create new client: add a new client directly during appointment creation
- Quick search: start typing name or phone number for instant search
Select Service
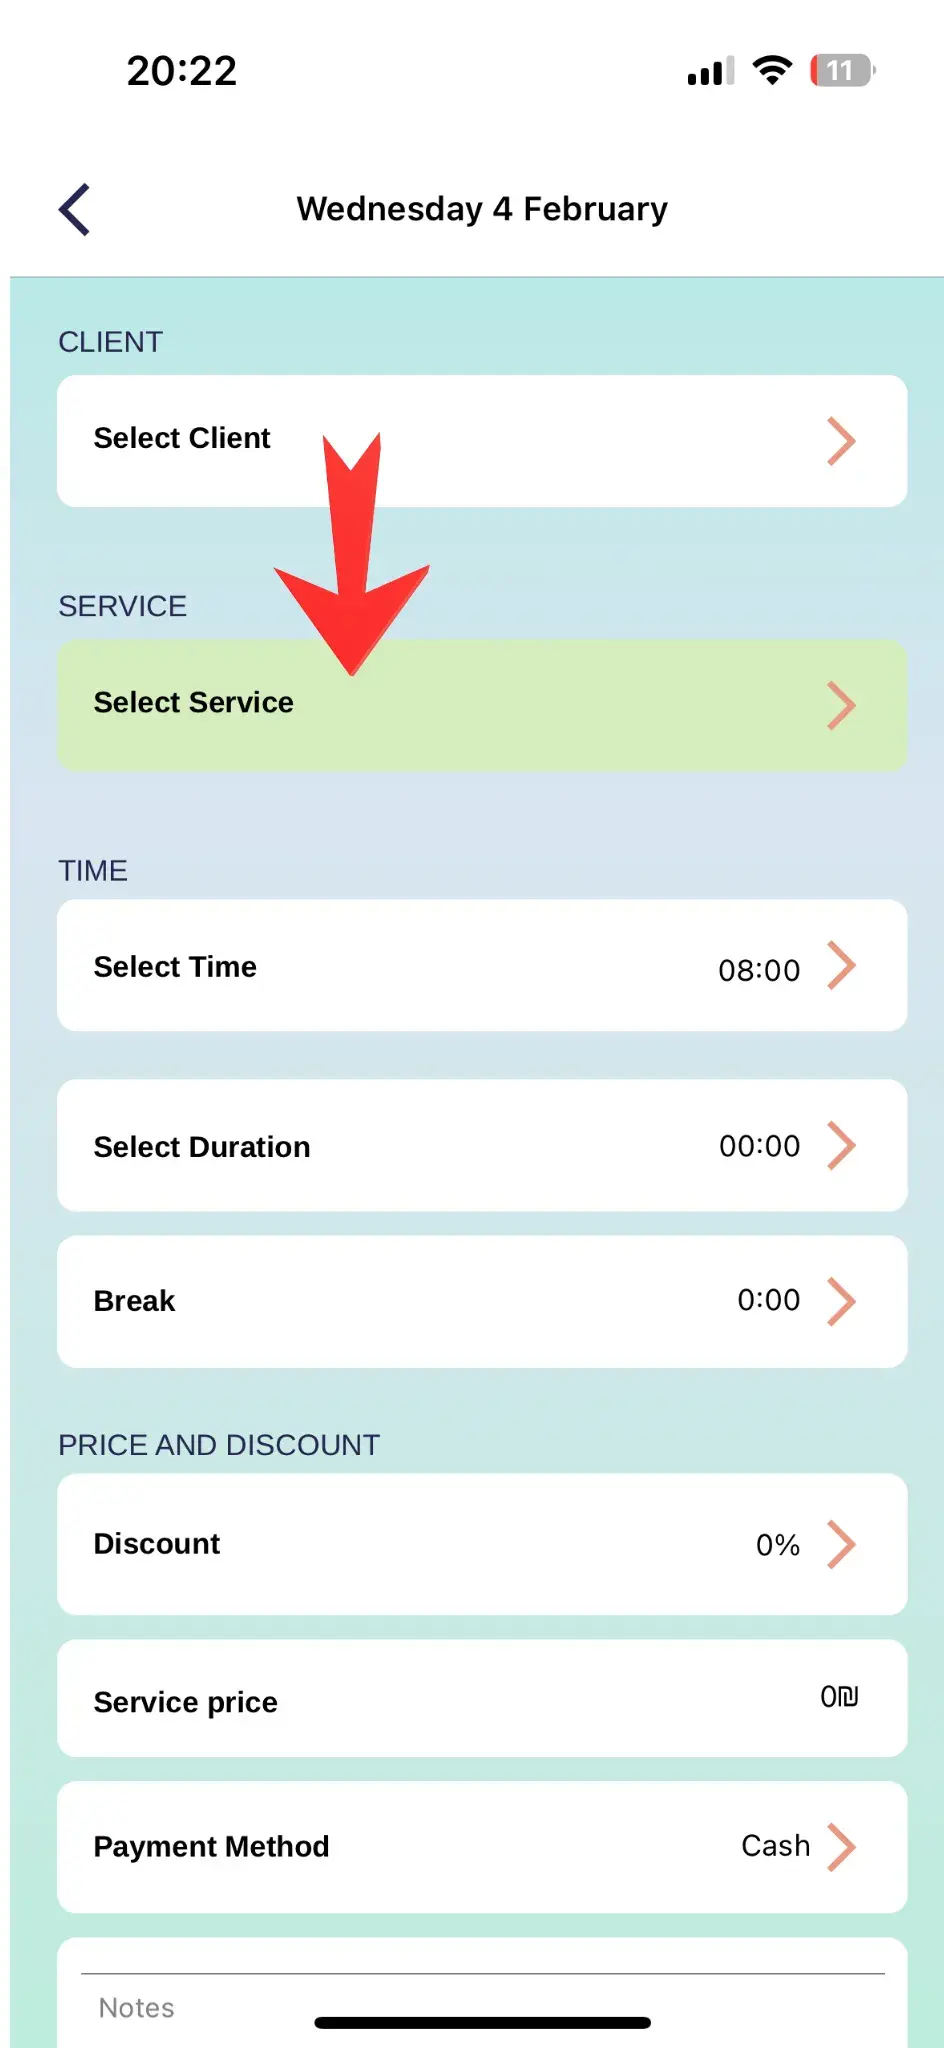
Specify which service will be provided to the client
Choose a service from your price list. Each service contains important information:
Service information:
- Duration - automatically determines appointment time
- Cost - service price from the price list
- Description - procedure details (if added)
Select Date & Time
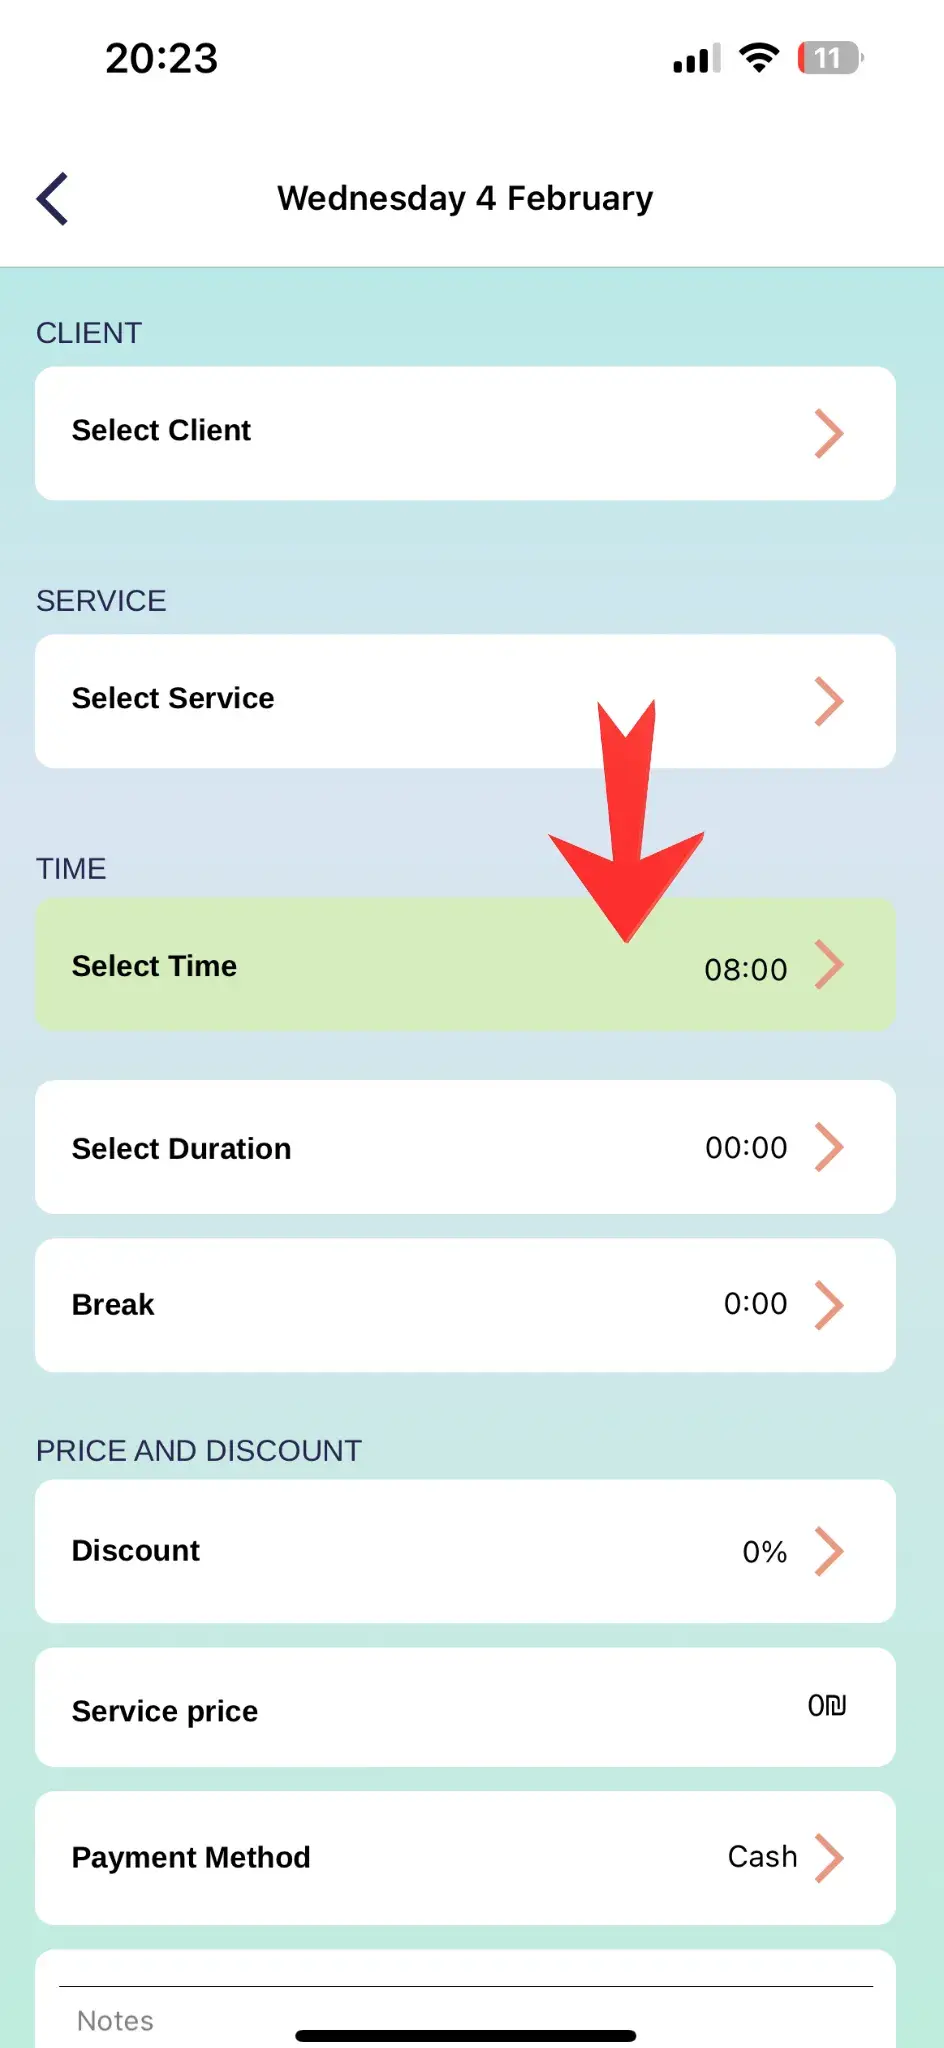
Determine when the meeting will take place
Choose a convenient date and time for the appointment. The system shows only available slots:
Time selection features:
- Available slots: only free time periods are shown
- Duration adjustment: you can change the procedure duration
- Break after appointment: add time to prepare for the next client
Appointment Details
Add additional information
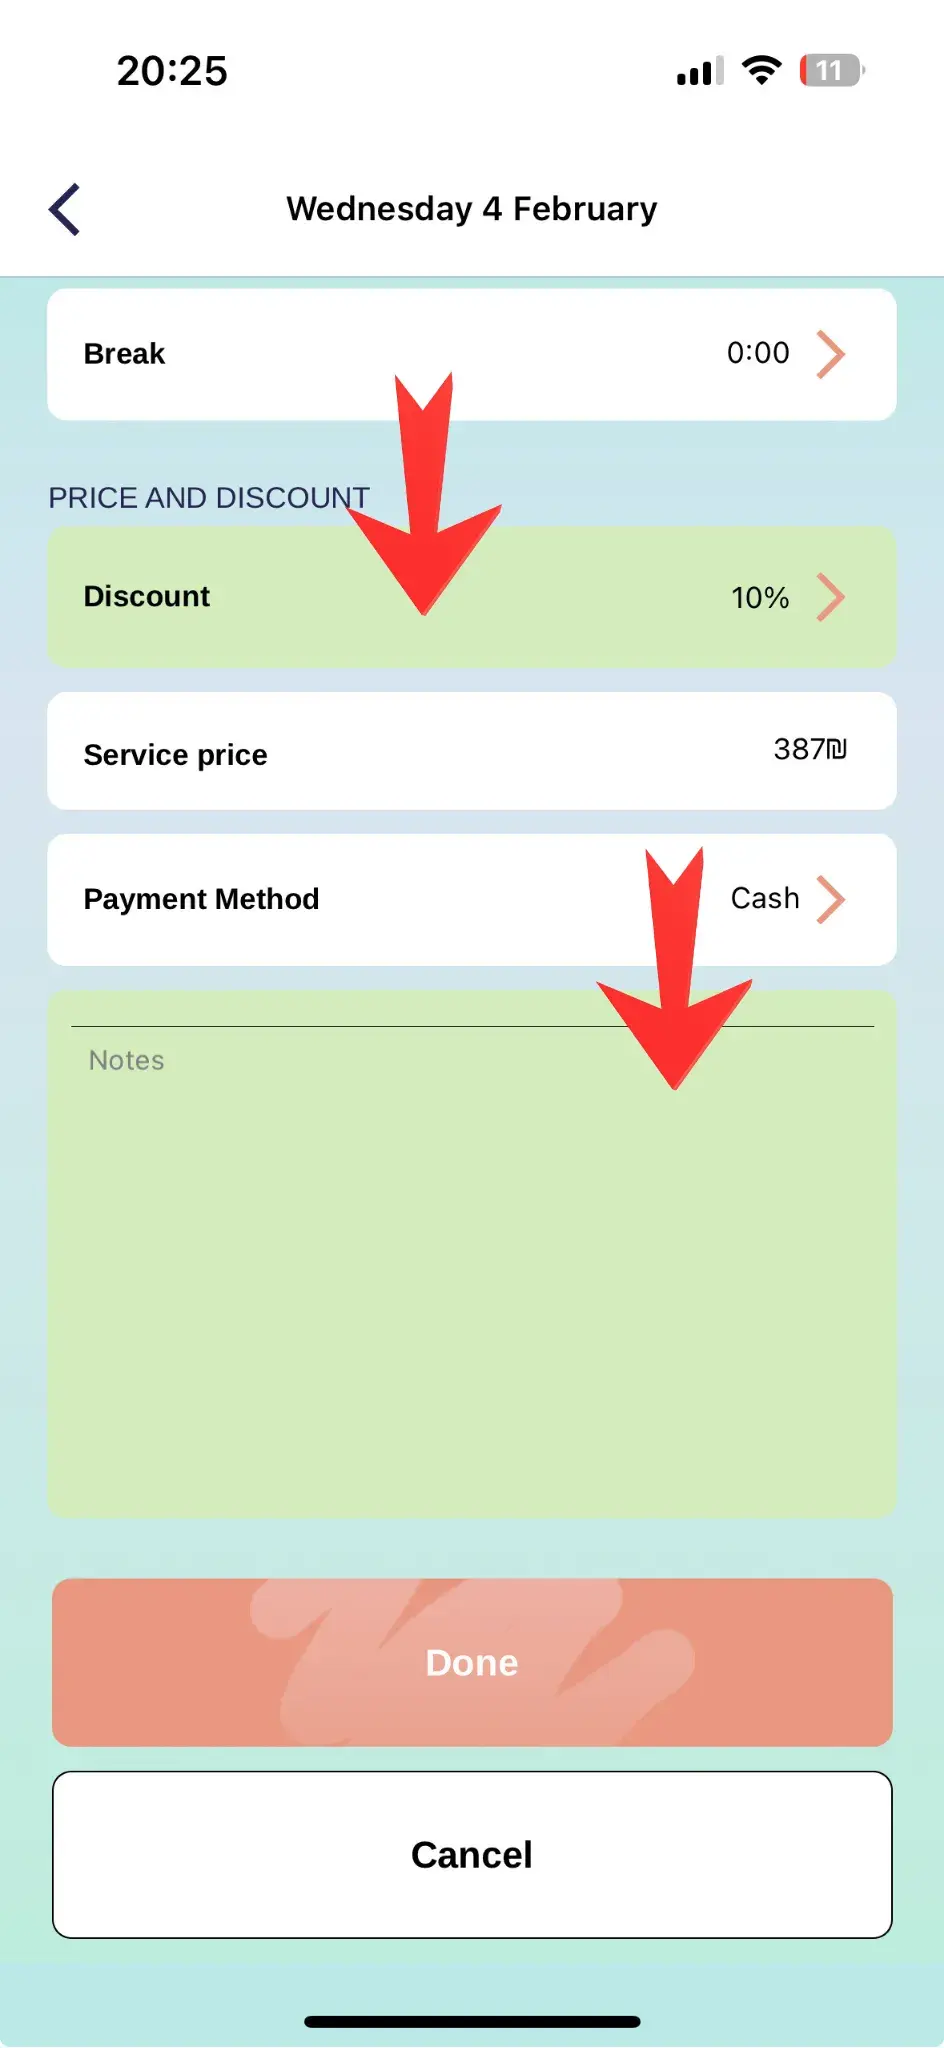
At this stage, you can specify additional appointment parameters:
Additional fields:
Discount
apply personal discount for client (percentage or fixed amount)
Notes
add important details: allergies, preferences, special requests
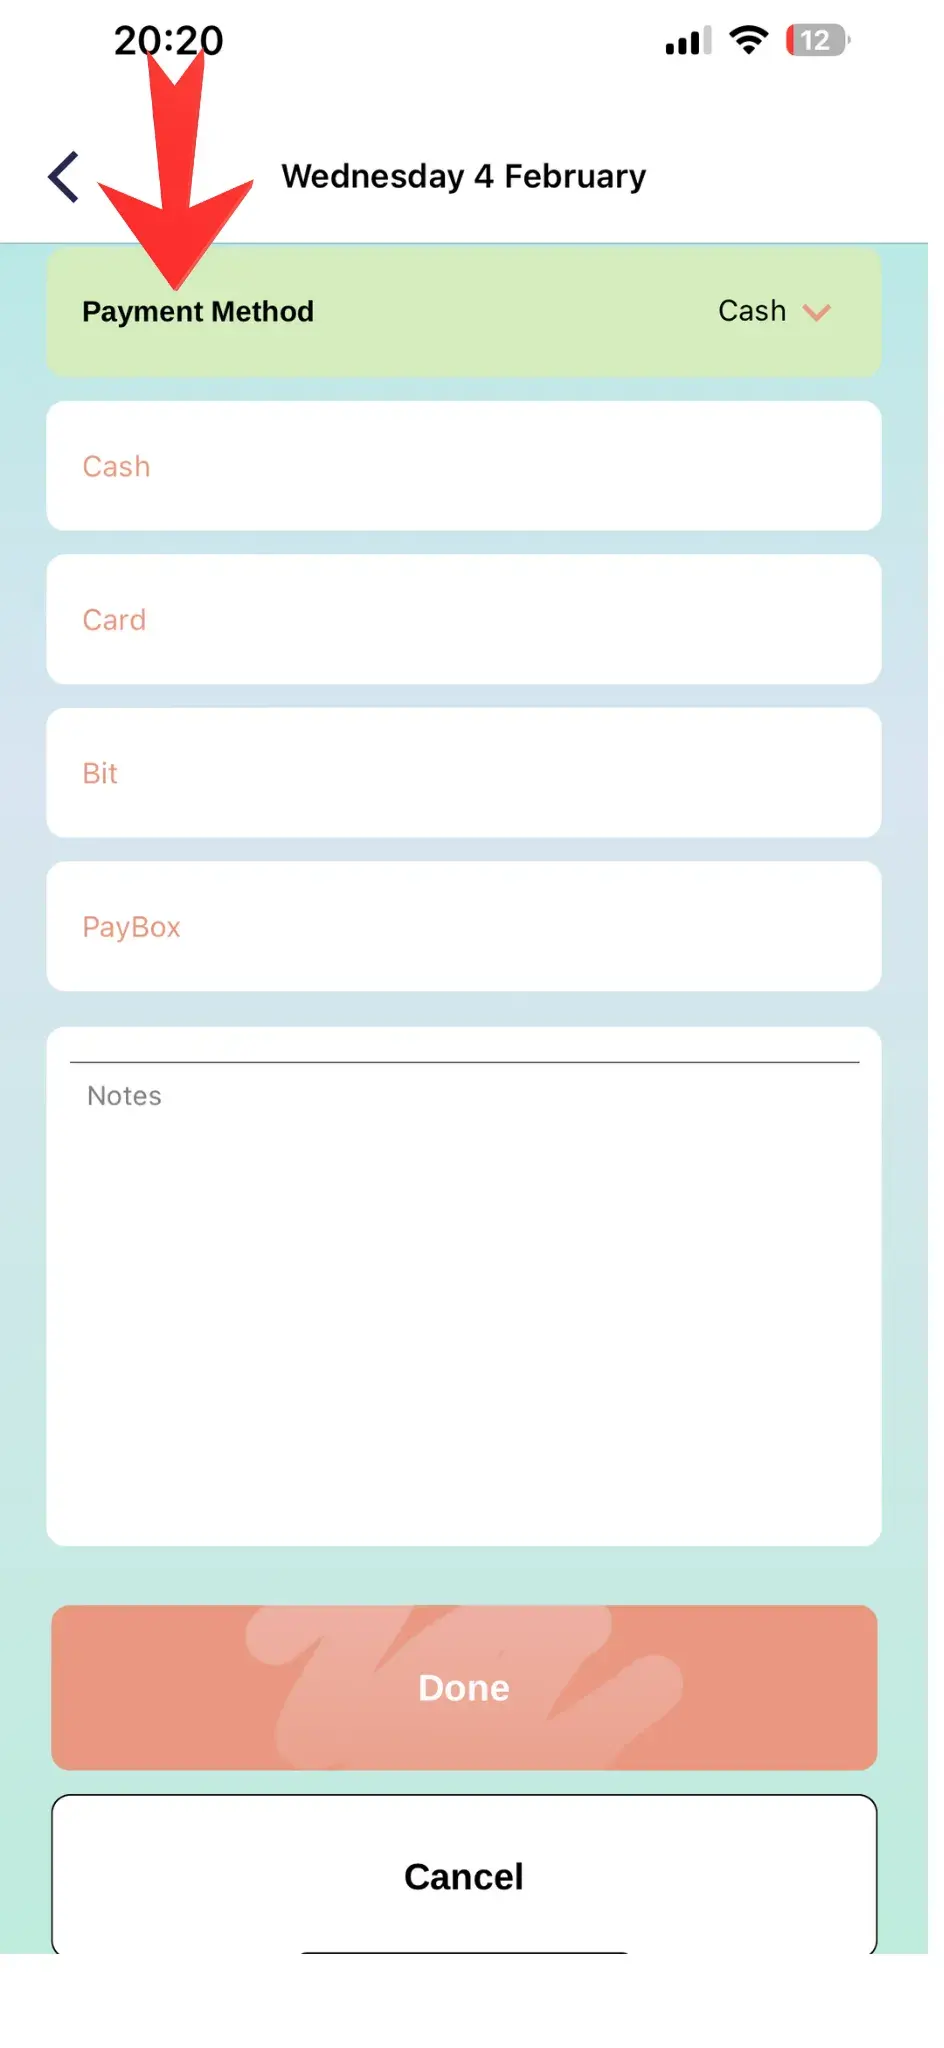
Payment Method
Choose how the client will pay for the service
Specify the preferred payment method. This will help you track finances:
Available payment methods:
Cash
Cash payment after service provision
Card
Bank card payment
Bit
Mobile payments through Bit app
PayBox
Online payments through Paybox platform
Send Notification
Inform the client about the appointment
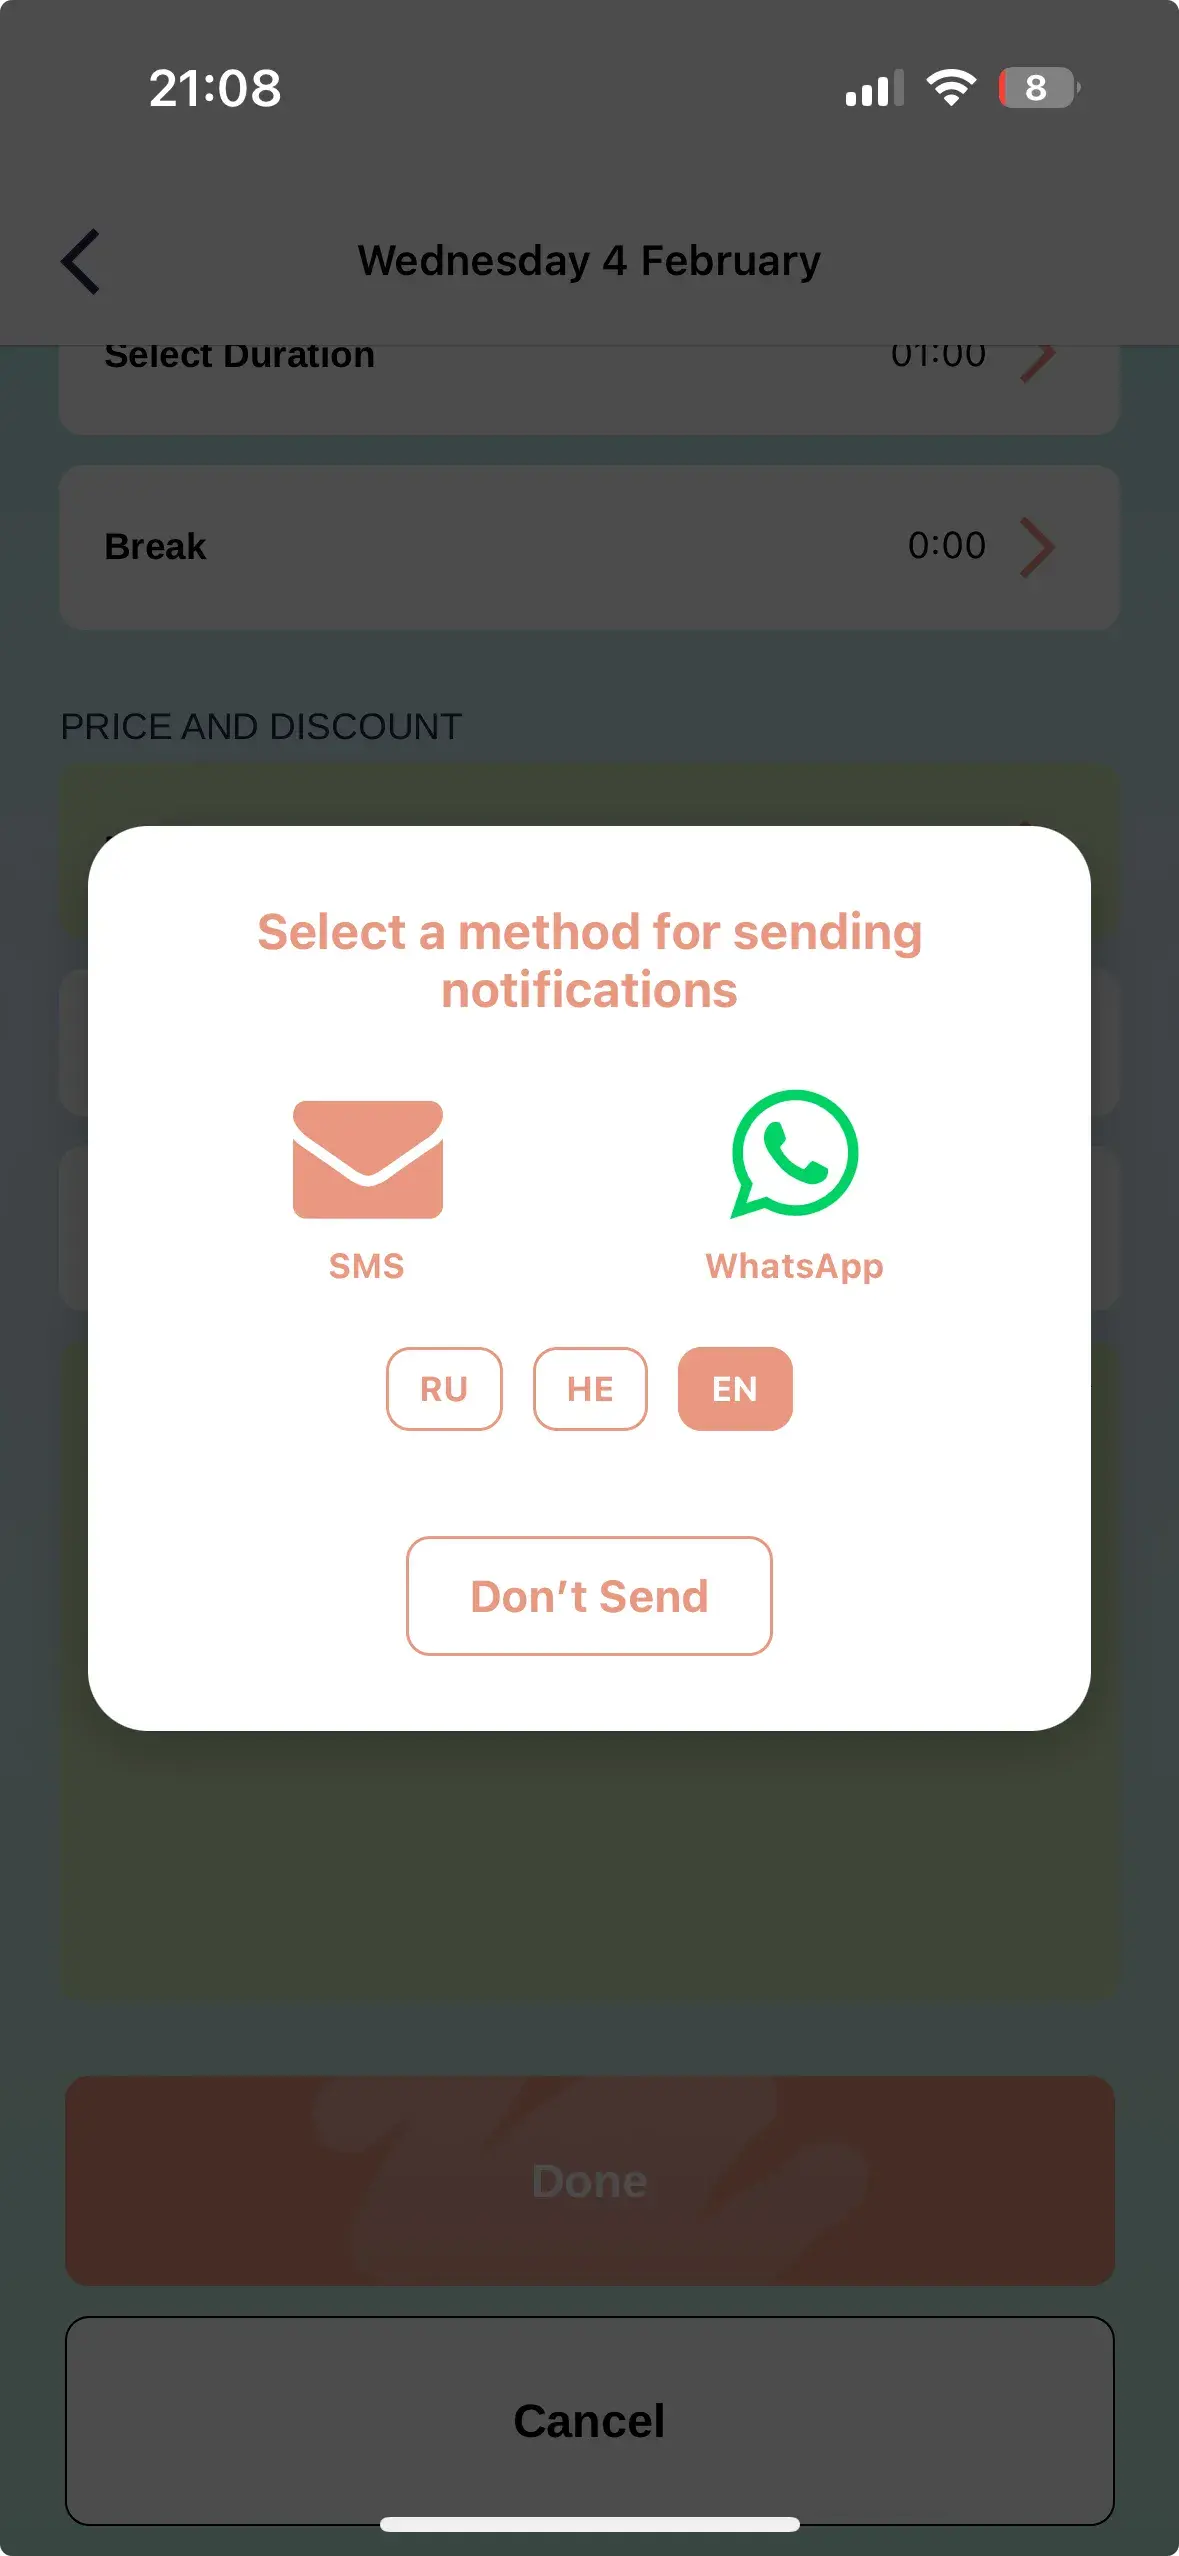
After creating the appointment, the system will offer to send a notification to the client. Choose a convenient method:
Sending methods:
- WhatsApp: instant message with appointment details
- SMS: text message to client's phone number
- Don't send: skip notification sending
Message language selection
You can choose the language in which the notification will be sent:
- 🇷🇺 Russian - for Russian-speaking clients
- 🇬🇧 English - for English-speaking clients
- 🇮🇱 Hebrew - for Hebrew-speaking clients
Useful Tips
Quick Creation
For regular clients, use the 'Repeat Appointment' function - the system will automatically fill all fields based on the previous visit.
Appointment Series
If a client needs a course of procedures, create the first appointment, then use 'Repeat' to create a series of meetings with the needed frequency.
Important Notes
Use the notes field to save important information: allergies, preferences, skin features. This will help provide better service.
What's next?
After creating an appointment, you can view its details, send a reminder to the client, add prepayment, or change any parameters. All appointments are displayed in your calendar and available for editing at any time.