
Client prepayment
How to require a prepayment from an individual client
What individual prepayment is
This setting lets you require a prepayment only from the selected client. Other clients continue booking according to your business's regular rules.
What you need before enabling it
Online payments must be connected
An active online payment system is required for the client to confirm an appointment with a prepayment. Once connected, payment is completed on a secure payment page.
When to enable prepayment
The client has canceled at the last minute before
The client regularly arrives late or does not attend
The client is booking a long or expensive service
You want to reduce empty time in your schedule
A new client books a service that requires material preparation
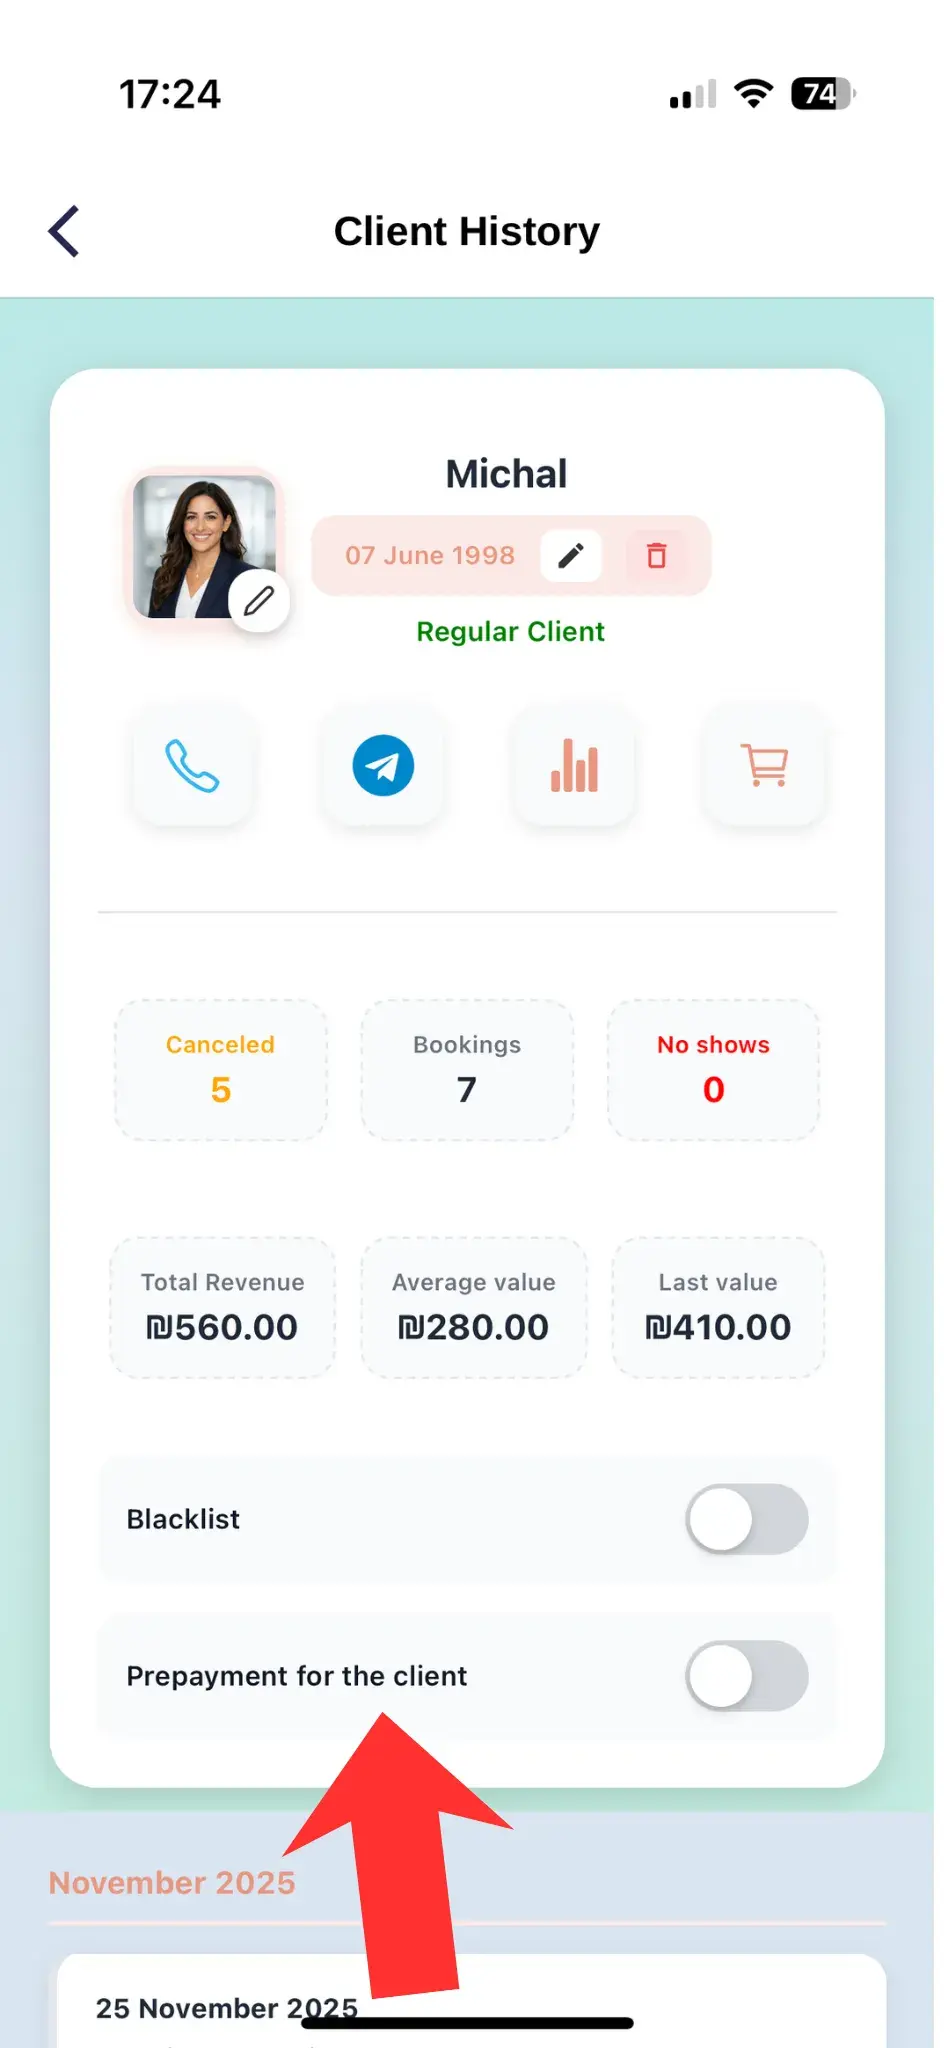
Managing prepayment
✅ Enable prepayment
- Open the Clients section
- Find and open the relevant client profile
- Open the client settings
- Turn on the prepayment switch
- Make sure the change was saved
- Inform the client about the new booking condition if needed
❌ Disable prepayment
- Open the client profile
- Open the prepayment setting
- Turn off the switch
- The next online booking will use your regular rules
What happens after it is enabled
The client sees a prepayment requirement when booking online
The selected time is not finally confirmed without payment
The prepayment is 50% of the selected service price
The client is sent to a secure payment page
The appointment is confirmed after a successful payment
Prepayment amount
50% of the service price
For a client with this setting enabled, the system requests half of the selected service price. The remaining balance is paid according to your regular payment rules.
If a service costs ₪200, the client pays ₪100 while booking. The remaining ₪100 is paid later.
Why a prepayment is used:
- The client confirms their intention to attend
- Part of the price already covers the reserved time
- The client does not have to pay the full service price in advance
What the client sees
The online booking process
- The client selects a service, date, and time
- The system displays the required prepayment
- The client sees the amount to pay
- The client pays on a secure payment page
- After successful payment, the client receives confirmation
Prepayment or blacklist
These are different restrictions for different situations
💳 Prepayment
- The client can continue booking online
- Payment is required to confirm the appointment
- Useful for cancellations and no-shows
- The setting can be turned off at any time
🚫 Blacklist
- Independent online booking is blocked
- The client cannot reserve time through your booking page
- The client profile and history remain saved
- The professional can create an appointment manually
💳 Use prepayment when you are willing to keep serving the client but want them to confirm the booking with a payment.
🚫 Use the blacklist when you do not want to allow the client to book online independently.
Benefits of individual prepayment
- The setting applies only to the selected client
- Reduces the risk of cancellations and no-shows
- Protects long and expensive time slots
- Does not block the client completely
- Can be enabled or disabled from the client profile
Use prepayment as an individual booking condition
Tell the client about the prepayment requirement in advance and make sure the cancellation and refund terms are clear. This helps prevent misunderstandings.